Once you have installed VB Express 2005 using this tutorial: VB Install, you can start to build your applications. We will start with a few minor features of VB to make a very primitive application and create an EXE from it.
First, we need to launch VB Express 2005 to get to the Start Page shown below:
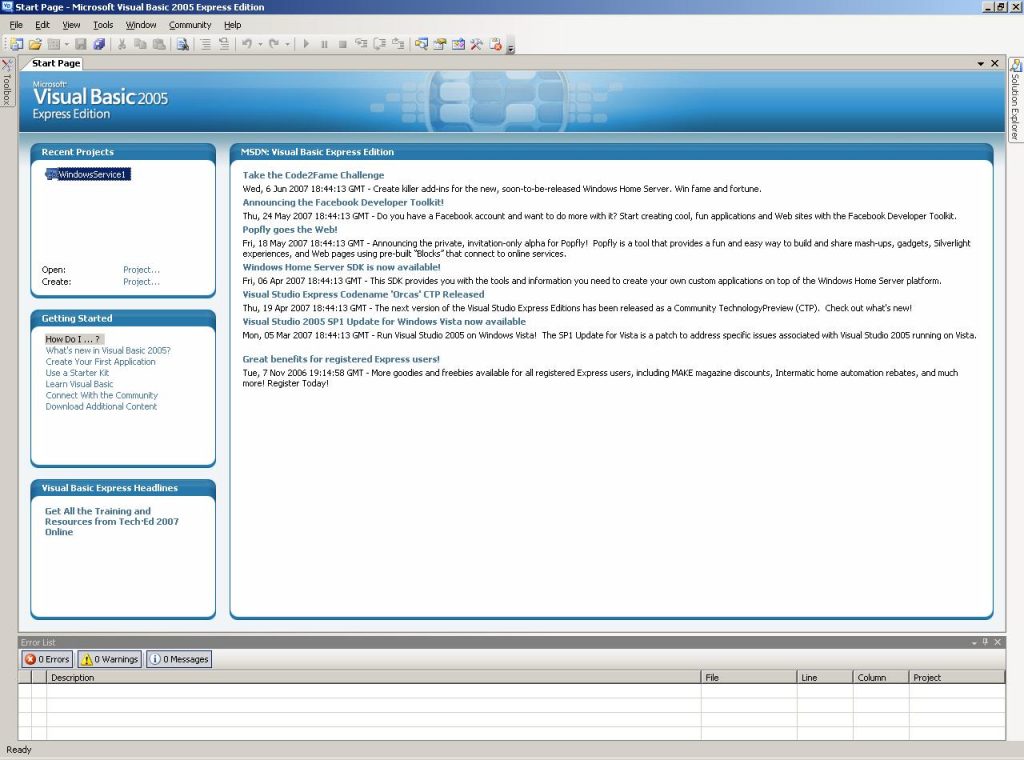
This is the “home page” of VB Express. This will give you news and updates, and allows you to start or open a project to be worked on.
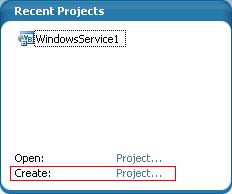
Click on the hyperlinked Project button to begin building a new project.
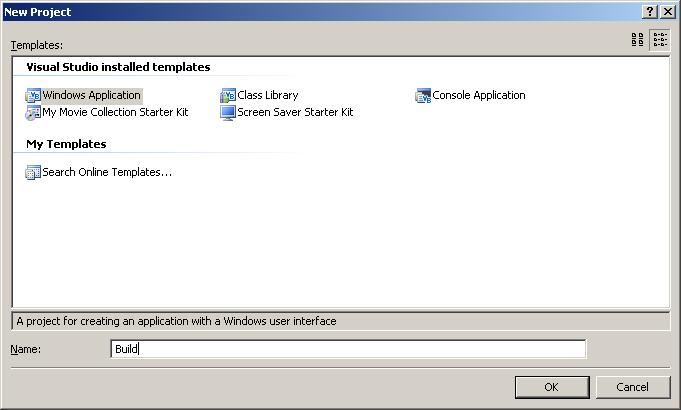
The above window will appear, asking you to name your project and to select what kind of project it is going to be. For this tutorial, we are going to use the generic Windows Application selection, and call it “Build”.
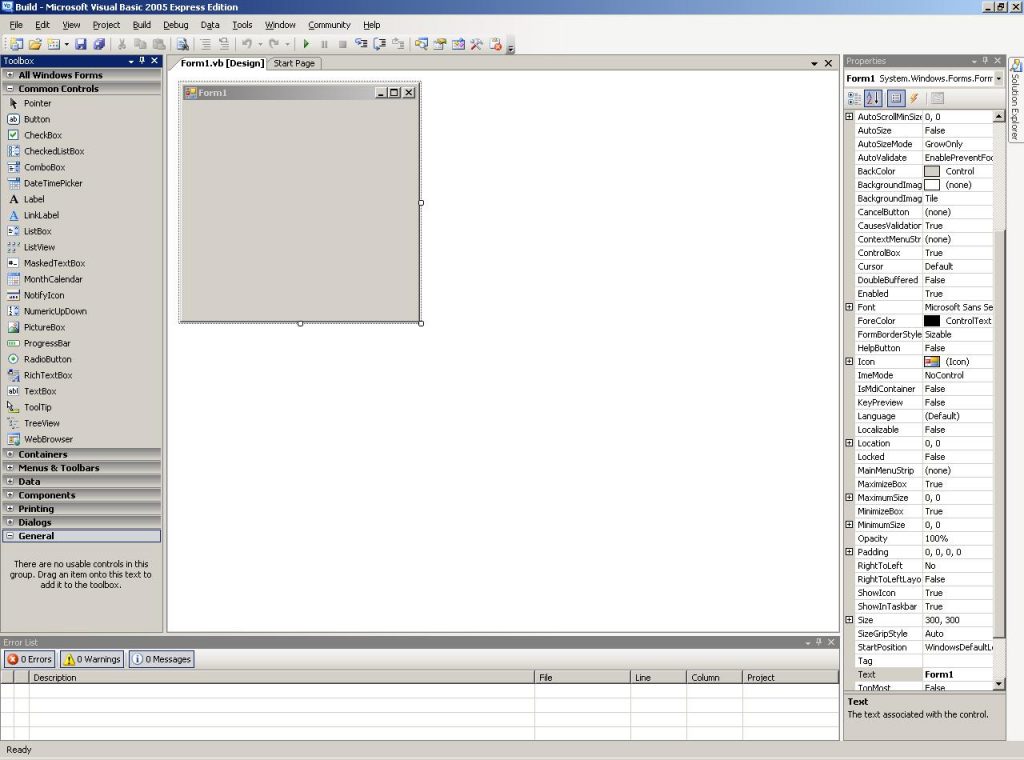
This is the main development interface. If you get big into VB programming, this will be like home. The main parts of this interface are detailed below.
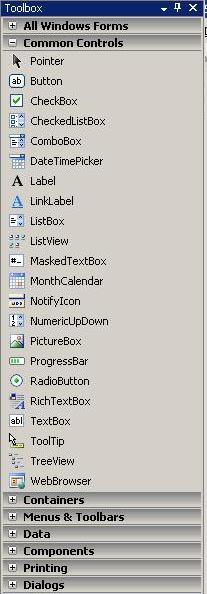
First, we have the toolbox. This is where you visually pick what you want to put on your form (the application). You will see common thing suck as buttons, text boxes, labels, and more. These items all describe themselves fairly well. To put them on a form you select one, then click (and drag if you can choose the size) on the form where you would like it to go. You can move and resize them after they are on the form, so it doesn’t have to be perfect now.
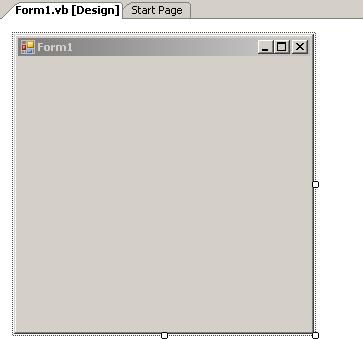
This is the section where the GUI(Graphical User Interface) is displayed when you are working on the Front end, and where the code is displayed when you are working on the code. As you can see, it is tab driven which allows you to have multiple screens, forms, and code listing open all at once.

Next we have the solution explorer. (This is usually set to only appear when you move your mouse to the right side of the screen; it will then slide out for you to see it. If you want it like I have it, you can click on the push pin icon at the top to make it stay in place.) This allows you to see all the scripts, icons, forms, and controls that are in your project. All we have now is our main form.
Last, but definitely not least, we have the Properties windows. This window shows you all of the options for whatever you have selected in the graphical interface. For example, if I had selected a label, I would see all of the configurable options for a label like: name, text (shown on the screen), font size, color, background color, and size. As you select the option to modify it, it will give you a description of what it does or what it modifies in the box at the bottom of the window.
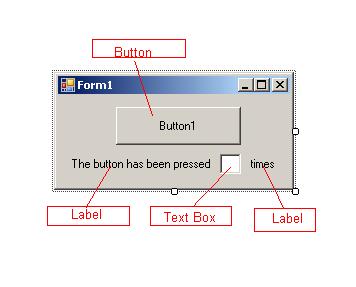
Next, we want to start building our form. When you place things on to the form in the future, you will want to remember to have a naming convention to follow, so you will be able to remember what you called things. I usually make an abbreviation for the type of object it is. For example, I will call text box that collects a user name “txtUser” or a label that showed the user name “lblUser”. After you place the label, look at the property window, it will now show you the option of “Text”. Click on it an type in “The button has been pressed” for the first one and “times” for the second one. For this tutorial don’t change anything else.
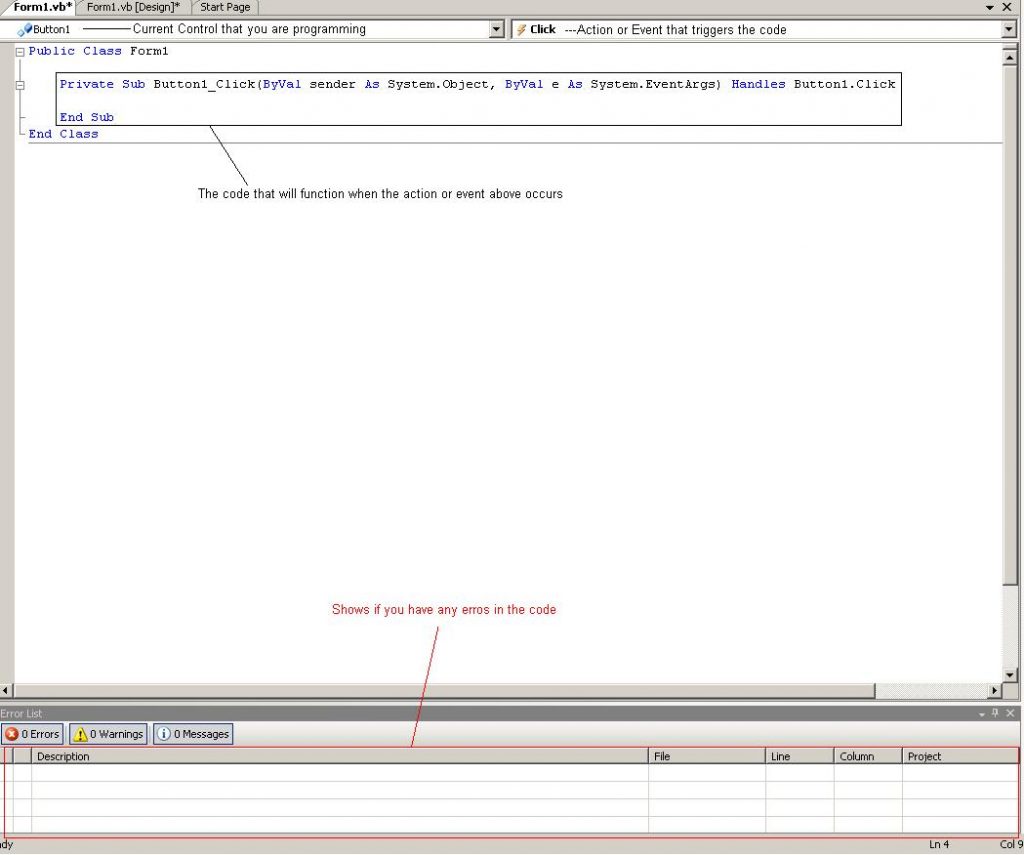
Next, we want to double click on the button that we placed on the form. This will take you to the code view and automatically set you up to start writing the code. Private_Sub Button1_Click tells you the name of the “section” of code. All of the stuff after it (ByVal ect….) for the sake of this tutorial, can be ignored. You will most likely not have to modify it in any basic programming that you do. The two cells at the top of the page show you what object you are writing code for (on the left) and what command, or action will trigger that code (on the right). So, in this case we are writing code that will be executed when Button1 is clicked. The bottom of this screen shows you if you have any errors in the code that you have typed and will alert you to where they are. It will also try to help you figure out why it is wrong.
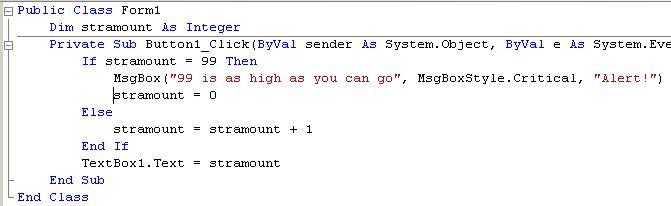
This is all the code we will need to make this application function. Lets break down some of this code:
“Public Class Form1” – This indicates that everything from this point, until the “End Class” code is for Form1.
“Dim stramount as integer” – This gets a word ready to be used as a variable of some sort. In this case I have made it an integer, as it will only and always be a number. These have to go right after the Class command or they will not be available from all Subs.
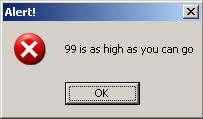
“If, Else, End If.” – This is one of the most common and basic commands in VB. It simply tells it to check something, and if it is true do option a, and if its not, do option b. In this case, we are checking for stramount to be equal to 99 and if it is to alert the user with a message box, so that they know they have reached the limit of the textbox I made. If stramount is not equal to 99 it simply makes stramount equal to itself plus one (adds one to the value of stramount.).
“Textbox1.text = stramount” – this makes the textbox that we made show the value of the integer.
So, every time the button is clicked, it checks the value of stramount, runs the code based on its result, and finally updates the textbox with the value.
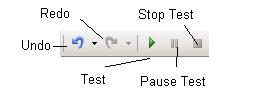
This control bar at the top of the screen allows you to Undo code and object changes, redo code and object chngaes, start debugging (run the application) pause debugging, and stop debugging.
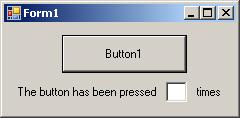
Click on Start Debugging to launch the application. It will show us our form. Press the button and the box should change to 1. Press it again and it should increase. It will continue to increase until it reaches 99 and you press it again, you will then see this:
Now that it works the way we want to, we want to build it so that we can give it to other people to use. First go to Build>Build (App Name), to make sure the application can successfully create the exe. Once that completes, goto Build>Publish (App Name). The following windows will come up.
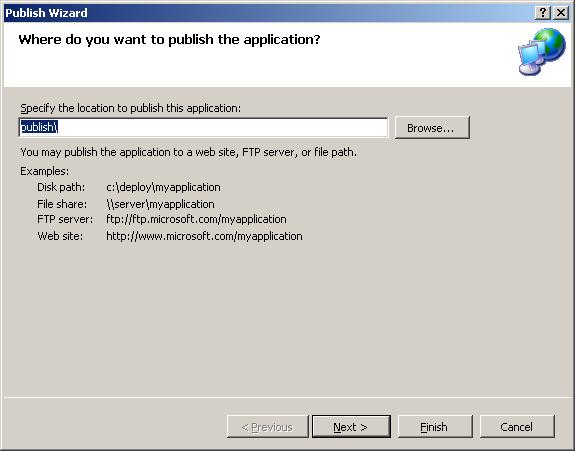
This window allows you to pick were you want to build the application at. I usually put a folder on the desktop for my builds, at least until I’m done with them. To do this, click on browse:
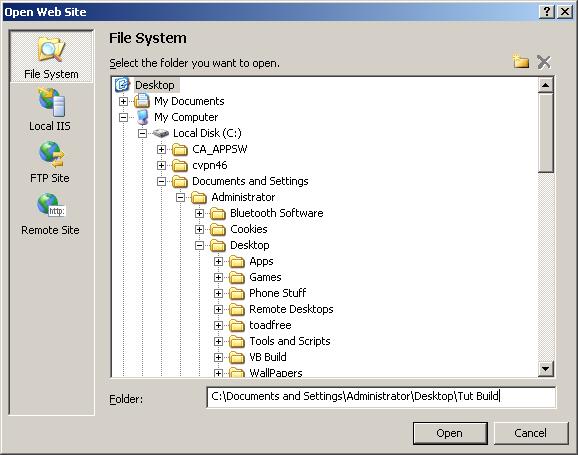
You will get this window. Select Desktop at the top of the tree view dialog. Then add the name of what you want to call the folder onto the end of the address. Click on Open.

You will be prompted to Create the folder. Click Yes. Once you do this, it will take you back to the original screen. Click on Finish to build the project. Once it finished building you should then see the folder you called it on your desktop. Open this folder.
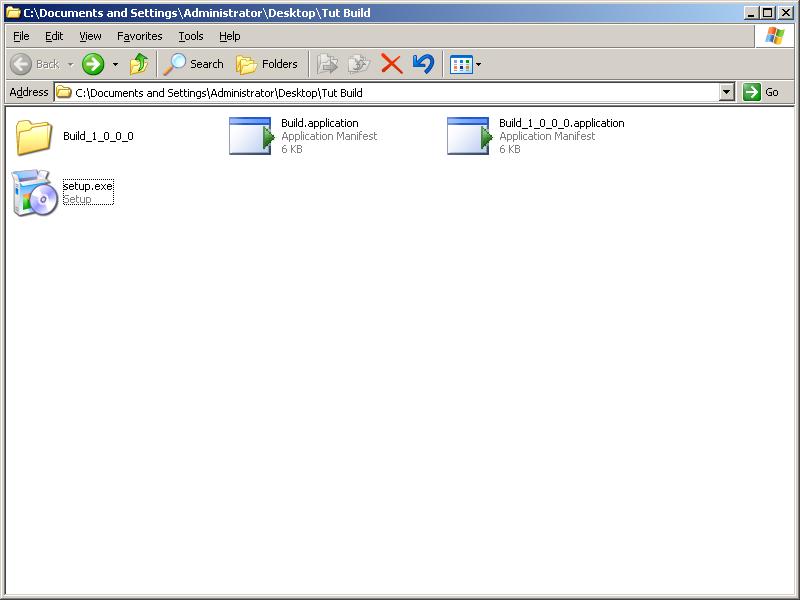
Inside this folder, you will see the above contents. There are two ways of running your application. First you can run the “setup.exe”. Or you can just run the EXE. I will cover both. First, the setup. Click on “setup.exe” to launch the application installation.
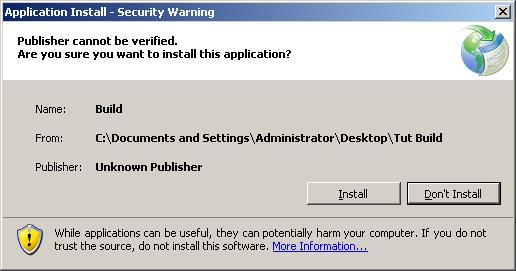
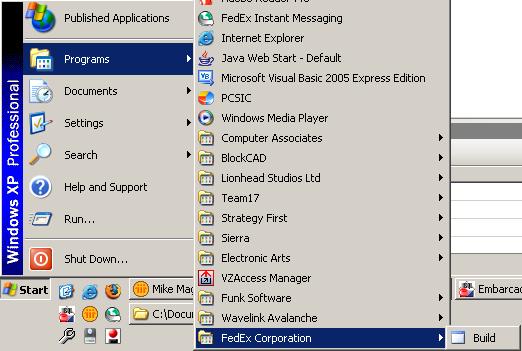
This window will pop up to alert you that you are about to install and unknown publishers application. Of course it’s unknown, Microsoft doesn’t know you personally. Click on install to continue with the install and it will finish automatically. Once it is done, it will automatically launch the application. If you go to your Start Menu, you will see that a folder has been created for you application.
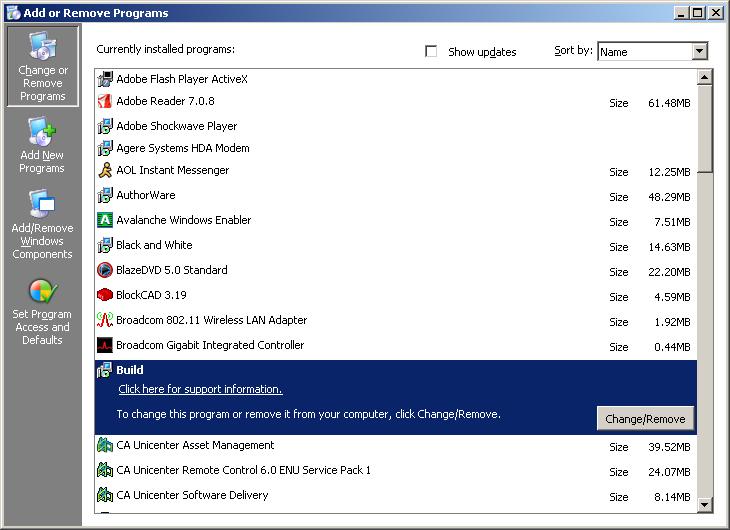
You will also notice that it is in the Add/Remove programs in the Control Panel:
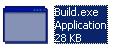
The second method is to run the EXE without creating/installing all the other stuff. In order to do this, simply go back to the folder on the desktop and go into the folder called Build_1_0_0_0. It will be different every time, but there will always be a folder there. Once you go into it you will see a file that looks like this:
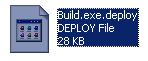
If you don’t see the .deploy at the end, follow this tutoral, to ensure you are showing file extensions of known files. Simply remove the .deploy and then you can run the application with the EXE. You can now put it anywhere on your hard drive and run it.