This tutorial will walk you through configuring a JavaScript based progress bar that can triggered by several things. The last tutorial I did, I mentioned doing it with PHP and the results of a query. That is what this tutorial is going to be about. For this tutorial it would be helpful to have a decent amount of entries in the table we will be working with. To assist with this I have uploaded a text file with a query in it to insert 150 rows into a table. Let’s get started:
Go to bram.us to download the files that will make the loading bar work.

First you will be at the site to download the software. Click on the link to download the latest version. Save the file to your computer somewhere where you can access it. It will be in ZIP format so you will need to extract the files within it.

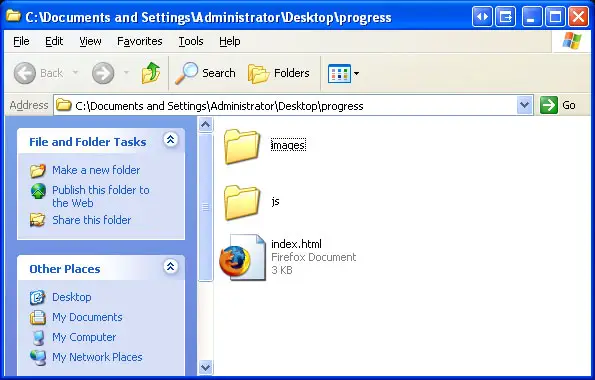
You should have a folder that contains these folders and the one file. That html file is the demo that is given with the progress bar. You can delete it or you can keep it for you to look at later if you ever want to go back and look at how it works. We, however, will be making a new file from scratch to call these scripts. Let’s make a new file and call it progress.php. Let’s start coding that file.
<script type="text/javascript" src="js/prototype/prototype.js"></script>
<script type="text/javascript" src="js/bramus/jsProgressBarHandler.js"></script>
These lines simply tell our file where to get the JavaScript that we will be calling for.
<?php
$conn = mysql_connect ("localhost","username","password") or die ('cannot connect to database error: '.mysql_error());
mysql_select_db ('dbname');
[/sourcecode]
This starts the section of php coding and the initializes the connection to the database. Remember to change the username, password, and dbname fields to what they are on your database.
[sourcecode language='php']
$sql="SELECT count(*) from `tutorial`.`tutorial`";
$query = mysql_query($sql);
$row = mysql_fetch_row($query);
$total = $row[0];
[/sourcecode]
This select returns a count of all the records in the database. In this case (if you used the text file supplied) is 150 records.
[sourcecode language='php']
$sql2="SELECT count(*) from `tutorial`.`tutorial` where `updates` = '1'";
$query2 = mysql_query($sql2);
$row2 = mysql_fetch_row($query2);
$signed = $row2[0];
[/sourcecode]
This select generates a count of how many people have signed up to receive updates about the site. This is indicated by the updates column being a 1.
[sourcecode language='php']
$percent = $total - $signed;
$percent = ($percent/$total) * 100;
echo "<H2> Percentage of people signed up for updates </H2>";
echo "<span style='color:#006600;font-weight:bold;'>Percent Completed</span> <br/>";
echo "<span class='progressBar' id='element1'>$percent</span>";
?>
Next, we do the math to figure out the percentage. We take the total record number and subtract the count of those signed up and that gives us the number that aren’t. Then we divide that number by the total and multiply 100 (the progress bar requires a full number and not a decimal). If the value is not a whole number the bar will round to the nearest whole number. Then we show our header for the bar and then show the percent completed logo. Finally, we create the bar with the variable that is calculated by the math.

If you open the file in the browse it will run the queries and show the percentage automatically. That concludes this tutorial. I hope you enjoyed it and it was easy to follow. Thanks for reading.
