In this tutorial we will create a “web 2.0” (I’m sorry I had to say it) style rounded button.
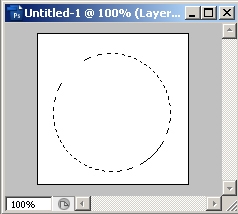
Start with a 150×150 pixel image with white as the background. Create a new layer. Select black as your foreground color. Using the circle marquee tool, hold down the shift key and draw a perfect circle.
Press alt + backspace to fill the circle with black.
Now we will apply some layer style to the circle of course. I will be using a blue gradient that I found online in a web 2.0 gradient pack. Go to the site and download the gradient pack by clicking here.
Download the file and extract the gradient. Then simple drag the gradient file into photoshop and drop it on the background. Then open the gradient tool and youw ill see that we now have some sweet web 2.0 gradients.
Now we will apply the layer styles for our circle. Right click on the layer and go to blending options.
Apply the following drop shadow settings:
Next apply the gradient settings. I will be using the dark blue gradient from the gradient pack we downloaded earlier.
Then we will use the following settings for the gradient
For the final touch we will add a stroke.
Apply the style and your image should look like this
Now we are going to add a little more gloss to the picture. First we will add the ring. Create a new Layer. Then alt click the circle layer to make a select the same size as the circle.
Fill the new layer with white keeping your circle selected.
Now go to Select > Modify > Contract
Contract the circle by 3 pixels
Now your circle select is smaller. Use the arrow keys to move the circle down to off set it form the original like below. Then delete the select.
Now we will set the transparency for the layer to 51%.
Your circle should look like this now.
Looks good, but web 2.0 requires more gloss (lol). Using the default photshop shapes draw the shape below.
You circle should look like this now.
CTRL + click on the circle layer again to make a circle selection. Then go to Select > Inverse on the photshop menu. Then delete your selection.
Now we are going to change the layer blend mode to overlay and the opacity to 43%.
The circle looks like this.
Now we will add a circle using the default Photoshop circle shape tool.
Draw the circle like on a new layer.
Now apply a 1px stroke inside using the blending options.
The image should look like this.
To finish it off add your logo. I also changed the circle layer to be 65% opacity. Here is the final result
You could go back and play with some other gradients to see what you can come up with.
Johnathan Ward is an experienced developer and consultant that writes tutorials to help other developers. In his day job, he is an IBM Watson Consultant with several years of experience deploying and customizing Watson Explorer solutions.


