This tutorial will show you how to create a custom web based search box for use on a website. For this tutorial we will apply a few simple techniques using Adobe Photoshop.
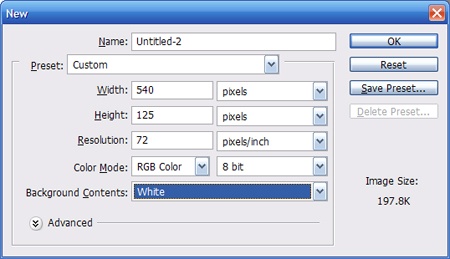
Start off with a new document 540×125 pixels with a white background.
Create a new layer. Using the rounded rectangle tool with a 10px radius, create a selection similar to the one below and fill it with black #00000.
Now create a new layer and add a circle. Hold down the control key to make a perfect circle, and then drag from the top of the box to the bottom, then side ways. I will use red for this so that it is easy to see.
Now select the move tool and nudge the layer left using the arrow keys until you get something that looks like this.
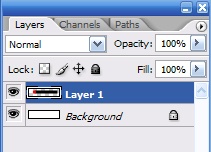
Now you need to merge the layer with the rounded rectangle layer. To do this, simply select the layer with the circle and press ctrl+ e. You should end up with 2 layers, the background and the shape you created.
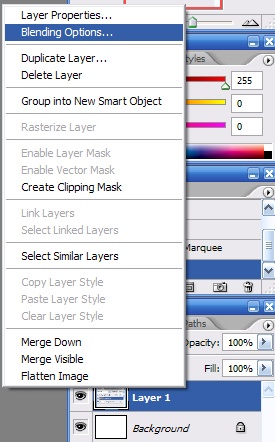
Now we need to apply some blending options to give the shape some style. Right click on the Layer with the shape and select blending options.
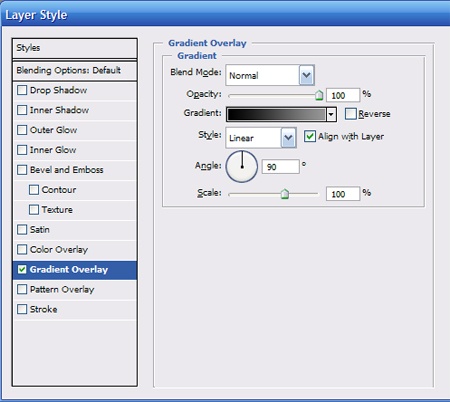
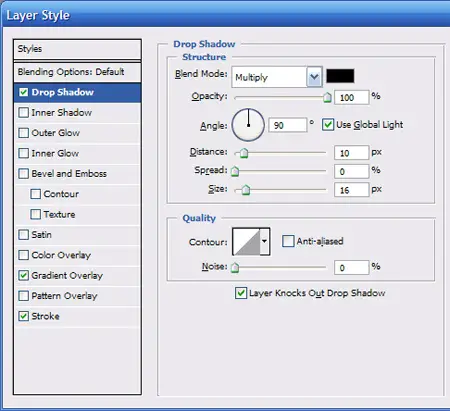
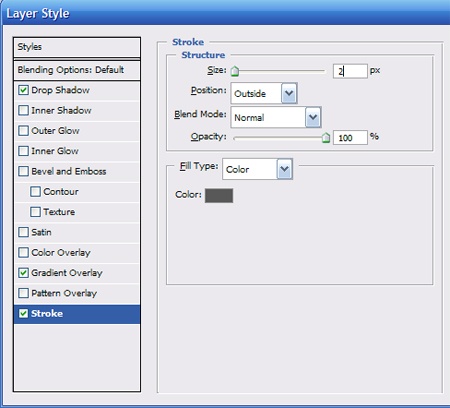
Now apply the following blending options to your shape.
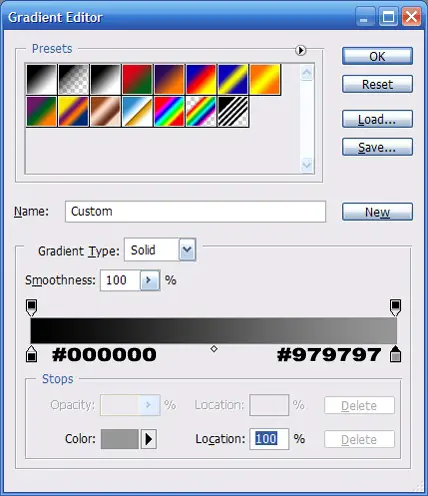
Gradient Overlay:
Here is the gradient we used:
Drop Shadow:
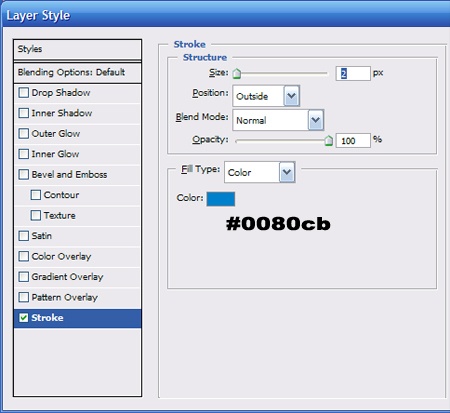
and Stroke:
When you are finished with all the effects click the ok button to apply them. Your image should look something like this.
Now we will have to add our search box. Create a new layer. Use the rounded rectangle tool with white as your foreground color and a radius of 6px to create a shape like below.
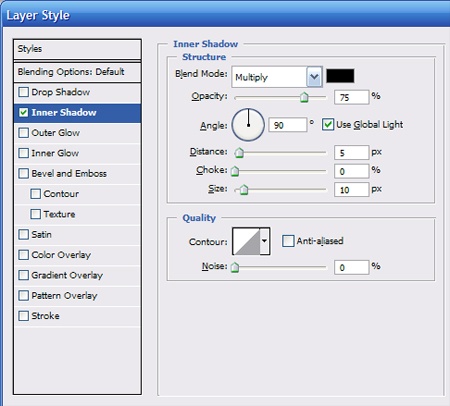
Apply the following blending options to your search box.
Inner shadow:
Click ok to apply the effect. Your image should look like this now.
Next we will add the search button. Create a new layer. Using the same rectangle tool (radius 6px, color #ffffff) make a selection like below.
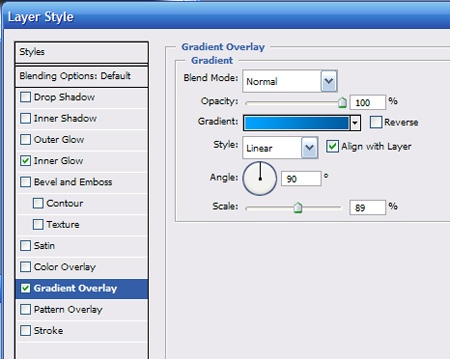
Apply the following blending options to the search button:
Gradient Overlay:
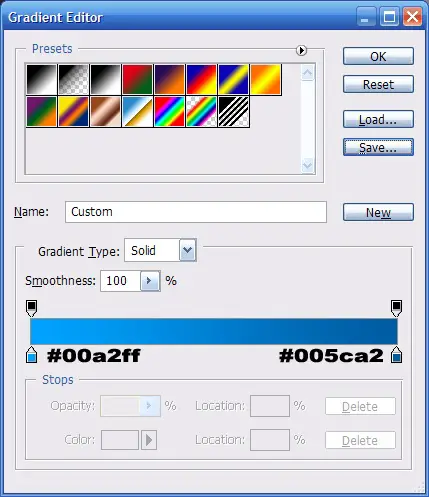
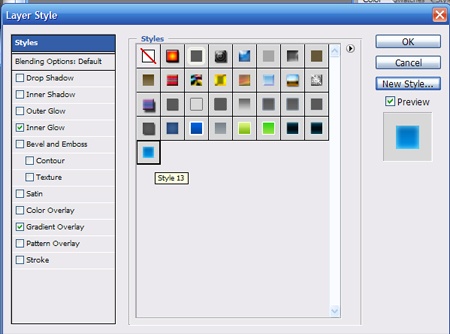
Here are the gradient settings:
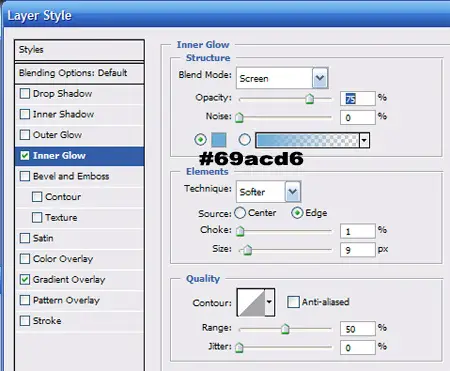
Inner Glow:
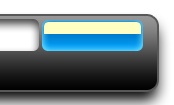
Apply the changes. Your image should now look like this.
Now we need to make the button look glossy. Ctrl + click on the layer to select the button. Then using the rectangle marquee tool, press and hold alt then drag the shape over the bottom of the rectangle to select only the bottom of the button.
On the Photoshop Menu, go to Select > Modify > Contract. Contract the selection by 2px and press ok. Create a new layer then fill the shape with white #ffffff by pressing alt + backspace. Your button should now look like this.
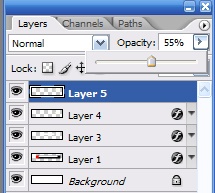
Now adjust the opacity of the white layer to 55%.
Your button should look like this
Type the word search on top of the box using the text tool with Arial Black 18pt white as your font. Apply a stroke to the text layer.
Apply the effect and you should have something like this.
Now we need to add a logo. Create a new layer and make a selection with the elliptical marquee tool. Fill it in with any color.
Now apply the following blending options that you did for the search button. The easy way to do this is to right click on the search button layer and select blending options. Then click styles at the top and click new style. Name your style and then exit.
Now right click the circle layer and select blending options. Click the style button and again and select the style we just saved. Apply the style and your image should look like this.
We use the same technique that we did for the search button to apply a glossy layer to our circle. Ctrl + Click the layer to select it. Contract the selection by 2 pixels. Create a new layer then fill the circle with white. Reduce the opacity to 55px. Refer to the previous steps if you need more help. You should have something like this.
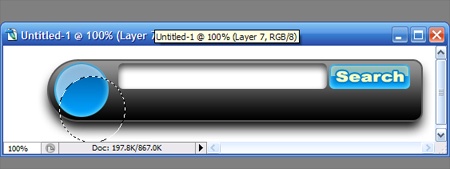
Now make a selection with the elliptical marquee tool over top your circle and delete it to so that it will look like this.
Now create a new layer and add your logo. I will use a rabbit because my search engine is speedy like that. You can find the rabbit in the custom shape tool if you want to add it. Then I added a 2px border like the search text. Then you can add your tag line and you are finished.
Johnathan Ward is an experienced developer and consultant that writes tutorials to help other developers. In his day job, he is an IBM Watson Consultant with several years of experience deploying and customizing Watson Explorer solutions.

