This tutorial will walk you through configuring you server with credentials for applications and users to connect with. This will allow you to determine who has what type of access as well as how they can update the tables in the database.
First you need to decide which method you are going to use to give users access to the database. The first (and slightly less secure way) is to create an actual login for each person going to use the database. This will require you to get the users credentials in a form before attempting a connection to the database. The alternative to this method is to create only on login for a specific application and then create a table with an encrypted field for the password for the users. Then when the application connects to the database (using the credentials you created every time), it will look into a table to see if the credentials the user supplied are correct. I will walk you though both methods in this tutorial. Both steps require you to start from the beginning. Let’s get started.
First let’s open our Microsoft SQL Server Management Studio by going to Start->Programs->Microsoft SQL Server 2008->Microsoft SQL Server Management Studio.
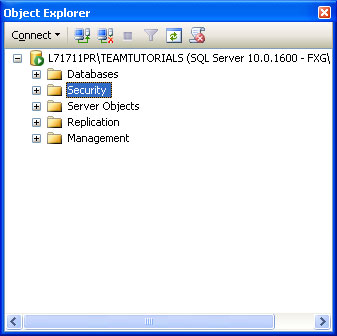
Once in, you should see a pane to the left of the window that looks like the above image. Expand the Security group.
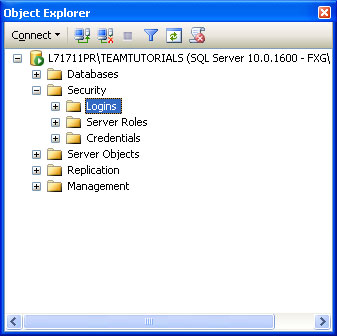
You screen should now look like above.
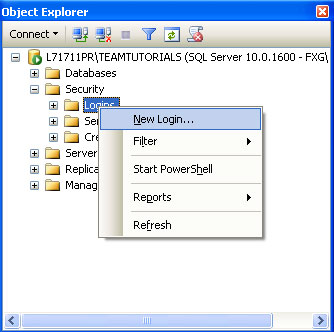
Right-click on the logins group and select new login.
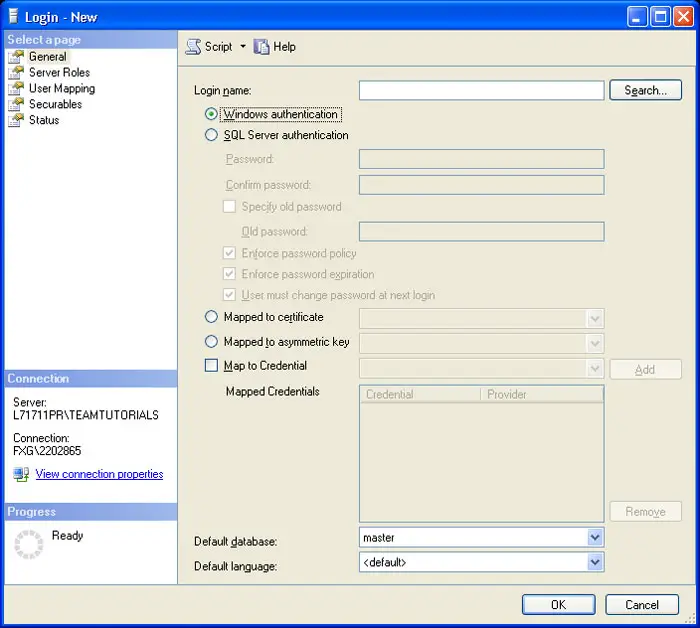
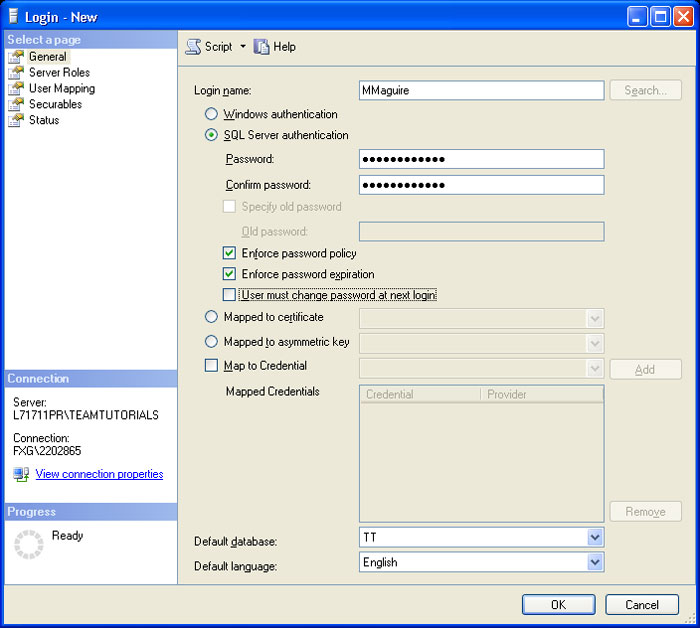
You will then be presented the above screen. This is the screen we will use to configure the user to have access to the database.
Fill in the login name with what you want the username to be. If you are using the table method for authenticating, it is common practice to name this something like “appname_login” where appname is the name of your application that is connecting to it. Select the SQL Server Authentication radial button. Now you need to type in the password you want that user to start out with in the boxes provided twice. Then select whether they will be forced to adhere to password policies (change x amount of days, certain length, certain types of text, ect…), and password expirations. Also check the box if you want the user to have to change there password the next time they log-on. Finally select the default database (which in this case is TT) and select the default language.
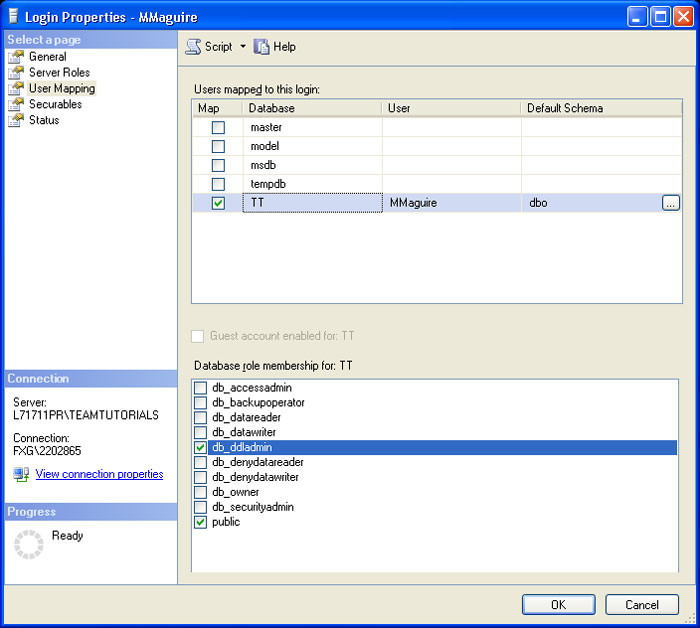
Now, in the left pane, click on User Mapping and check the box for the database we want the user to have access to and then select the access type from the bottom window on the right that you want them to have.
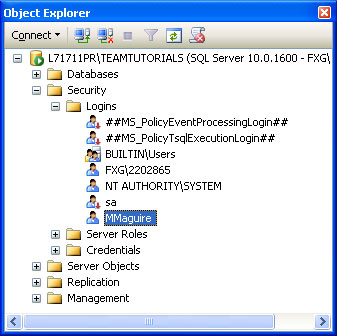
Now if you expand the Login directory you will see the user we just created. The user will also appear listed under the users group that is under the security group of TT since we mapped his credentials to that database. Simply do this for each user that you want to have access to the database if you are using the login for each user method. If you do not want to use the table method, you can discontinue reading here as the remaining steps will be fore creating a table for credentials and how to set it up. There are two ways to create a table, you can do it in the Graphical Interface, or you can write the script yourself. What I would recommend if you are new to SQL is to create it in the graphical interface and then view the code that it creates so that you can get an understanding of what the commands and syntax of SQL are. Let’s do it in the graphical interface:
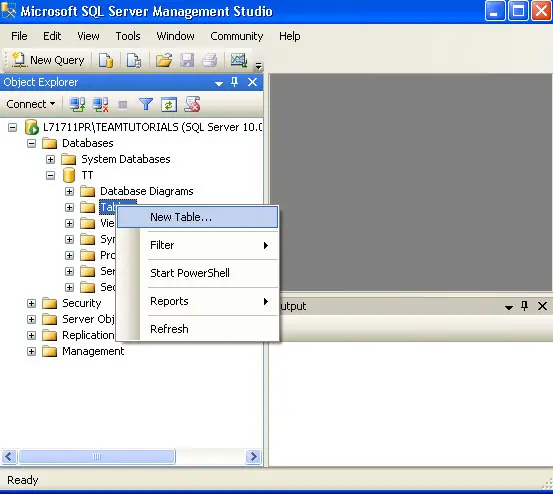
Expand the databases collection, and then expand your database that you created. Once you do that right click on the table collections and select New Table…
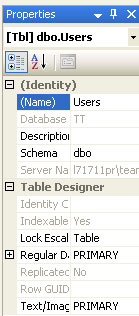
Once the information loads, you will see a properties window to the right that will allow you to name the table. Name it something like ‘Users’ or ‘Credentials’. Once you do that we need to fill out the information for the table.
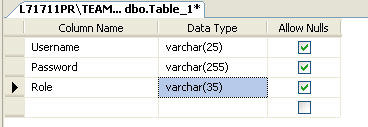
To create the info just begin typing in the appropriate box. Once you insert information into the box and move to the next field, the builder will auto-create the next line(column for the table). Make three columns to match what I have above. This will allow us to store the username, password, as role as a role for the user. This will allow us to use this field in our application to determine what the users can and can’t do easier. Also note that I have made the length of the password 255 characters. This is because I intend to encrypt the password that goes into this field which will take up more characters than required. I will cover this in a future tutorial.
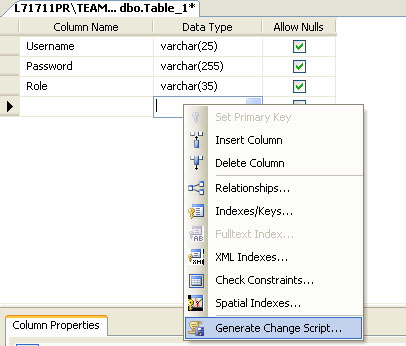
Now that we have finished making our changes we can save the table but first let’s take a look at the code that this is going to generate. Right-click anywhere on the editor window and a menu will pop-up allowing you to select ‘Generate Change Script…’.
Once you select that menu option, the above window will appear with the script that the system would run to create the table. Look over it and try to understand what they do. Look the commands up in the help file and Google them to see what they do. This will be a good way to understand the commands. You can copy and paste this information into an SQL file and run it to create the table. Click on No to close the window once you are done and you will be taken back to the original screen.
Once you have everything in the table we will need, we can right-click on the tab for the editor and select save. This will save the table to our database.
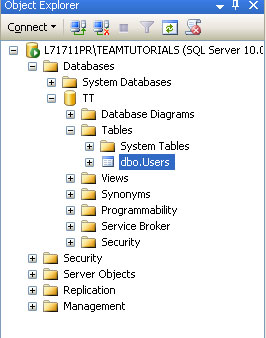
Once the file finishes saving you should see it in the tables folder if you expand it’s view as above.
Now we need to insert some info into the table. Right-click on our database and select New Query as pictured above.
The query to insert people in this table will be as follows: -Note- It is good practice to capitalize all SQL command and tables so that you get differentiate the text easily.
INSERT INTO DBName..TableName VALUES(‘UserName’,’Password’,’Role’)
For example, if I wanted to create a user in the table for me with the password of password123 and the role of Admin the query would look like this:
INSERT INTO TT..USERS VALUES('MMaguire','password123','Admin')
Type your query into the text box and click on the green play button on the top portion of the screen to run the query.
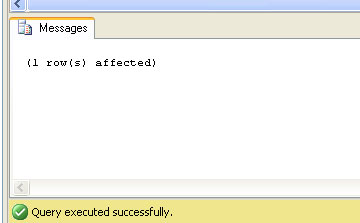
You should see this message if your query has been successfully ran. If not, please check your query for mistakes. Now we can do a select statement on the table to see our user that we just inserted.
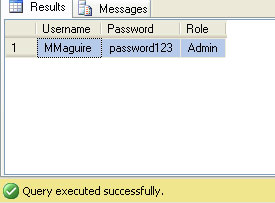
SELECT * FROM TT..USERS
Once you run the select statement, the screen in the middle will show you the results returned as above. You can now do the above steps for each user (inserting them with the query). Once you do that your table is completed. This will conclude this tutorial. Next, we will look at using Visual Basic to call this table and verify a user has permissions.

